Boris Continuum UpRez and Film Look
Boris FX is known for its comprehensive effects packages such as Boris Continuum Complete. Recently they started offering nine units that you can purchase a la carte: Lens Flare, Motion Key, Pan and Zoom, UpRez, Chroma Key, Film Look, Glitters, Optical Stabilizer and Light Rays. All of these are plug-ins which are compatible with Adobe After Effects, Adobe Premiere Pro, Apple Final Cut Pro, Apple Motion and Apple Final Cut Express. Due to space limitations, only two of the units are covered in this review: UpRez and Film Look.
UpRez is a plug-in that enables editors to resize SD footage to match HD frame sizes in a way that enhances the sharpness of the image to better match HD resolution.
Film Look is a set of tools that alters the video image in ways that emulate film texture, color and motion.
Both plug-ins were tested using Final Cut Pro as the host application.
FEATURES
Expanding an SD 720x480 frame to an HD 1920x1080 frame is a considerable resizing that exposes the lesser detail in the SD footage. While all NLE systems provide tools for resizing clips, they do not employ methods to compensate for data loss.
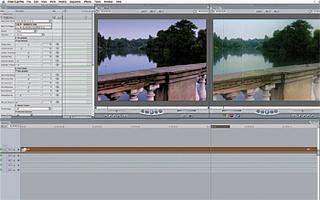
Boris Film Look user interface Boris Continuum UpRez utilizes a sophisticated image sampling technique with edge detection that compensates for missing detail in the resized image, increasing detail while also smoothing the result. When the UpRez effect is placed on a clip in the timeline, you can access the controls and view the results in the source and record monitors. The UpRez controls allow you to match the clip to its source parameters, providing options to select the proper original pixel aspect and source size, such as NTSC DV 720x480.
The next control in the sequence provides accurate x- and y-axis resizing and three choices for framing: Fit in Frame (letterbox), Fill Frame (crop) and Distort to Fit (stretch).
The last step is the defining one. Under the "Quality" menu you can select the level of sharpness desired and the amount of edge smoothing that may be desired. To achieve the final enhancement you can choose one of six options for rendering: Fast, Sharp, Standard, Smooth, Magic Smooth and Magic Sharp. Magic Sharp and Magic Smooth employ advanced algorithms to enhance or soften the image in a way that compensates for data loss and artifacts associated with image resizing.
Boris Fx's Continuum Film Look is actually a set of six effects: Film Process contains extensive tools that allow you to create a deeper color range that emulates film's broader color space. The Pre-Process section provides some basic controls, such as saturation, brightness and contrast, but also has a section that mimics lens-misting filters. These can be further fine-tuned to add a mist effect to shadow or highlight areas. There is another section that allows you to add tint to the overall color, shadows or highlights. Tint color can be selected from a full-spectrum color wheel. The Post-process section provides controls to add an overall warm or cool hue, plus another set of controls for saturation, brightness, contrast and gamma.
Film Damage adds the familiar artifacts of film: flicker, shake, grain, dirt, hair and scratches, as well as provides a very complete depth of control over each element. For example, the controls for scratches include density, lifetime, width, opacity, speed and color.
Film Grain creates a random grain structure to simulate film's texture. The controls are also quite extensive, allowing you to add grain that is very subtle or very pronounced. Grain can be made monochromatic or in red, green and blue and the amount and size of the grain can be precisely controlled. But most importantly, it appears randomly as it would on real film, so the effect is very convincing.
Match Grain has some of the same parameters, but allows you to work from an actual sample from a film transfer. One nice feature in this effect is the ability to view only the generated grain layer, which makes it possible to see very clearly the size and dispersion of the particles as you make changes.
Deinterlace converts interlaced video clips into progressive-scan frames. With this toolset, you can do a simple deinterlacing of video frames, simulate a 3:2 pull down, or convert the frame rate from 29.971 to 23.976.
Prism adds a three-color blur that emanates from the center of the image. At its most subtle settings it simulates a certain type of lens aberration, and at extreme setting it is downright psychedelic. But the controls allow for all choices in between.
IN USE
To get acquainted with the Continuum UpRez plug-in, I followed the directions in a tutorial on the Boris Web site. The tutorial is designed to allow you to make a comparison between a simple frame resizing in FCP and one with enhanced detail using Boris UpRez. The process is a bit complicated because this type of task requires "nesting" in Final Cut Pro. That means you can't just drag the effect onto the clip and make it work. Instead you have to create a sequence within a sequence. This is really an FCP issue, and not the way Boris designed things. It's a bit of a nuisance, but it's not difficult once you get used to it.
The first step in Final Cut Pro is to go to the Editing tab under User Preferences and disable "Auto conform sequence," and "Always scale clips to sequence size." After doing this, I created a sequence with the HD parameters of 1920x1080. I then added a 720x480 SD clip to the timeline. Using the FCP Motion tab, I scaled the image up 299 percent as instructed in the tutorial. This makes the SD clip fill the HD frame completely. I then dragged the BCC UpRez effect onto the clip to activate it.
After a bit of work, I was able to achieve some pleasing results. The Magic Sharpen greatly increases the sharpness of the image while retaining a natural look. And on some clips, the Magic Soften option improved detail while retaining an aesthetically pleasing texture in the image.
With some experience and experimenting, Continuum UpRez is a very useful tool. However, it is somewhat hampered by the way Final Cut Pro handles effects. Effects and filter controls are displayed in a long list of sliders and numbered boxes that quickly become hard to track. The best solution may be to design a separate interface that becomes activated when the effect is applied or edited.
Now to answer a big question: Can you really make SD look like HD. In my tests, I found I could improve the SD image and resize it to match the HD frame size in a way that made it blend with native HD material rather well. You can't really turn SD footage into HD, but the improvement is significant enough to allow mixing the formats on the timeline in a pleasing way and avoiding the jarring jumps in frame size so often seen.
I do have one piece of advice: If using Continuum UpRez with Final Cut Pro, make sure you are running the latest version of FCP.
I tested the Continuum Film Look tool set on DVCPRO HD 720 24p footage shot with the Panasonic HVX200 P2 camera.
The Film Process effect is the most complex in the package, as it offers precise image adjustment on many levels. However, in a short time, I was able to adjust the vid-eo image in ways that were either subtle or dramatic. Starting with the Pre-process controls, I added some saturation, which deepened the colors. Then I played with the Lens Misting until I achieved something similar to a Black Pro Mist lens filter, which I sometimes use when shooting video. This has the nice feature of enabling you to add mist to either shadows or highlights. Just for fun, I added a bit of tint. This also is divided into overall, shadow and highlight, so I was able to add some amber to the lighter areas, creating a late afternoon look. The Post-Process area gave me a chance to make some final adjustments after the other effects had been applied. The misting had reduced some of the contrast, so I brought that back in at this stage. In the end, I took a plain, bluish outdoor clip and transformed it to one that had the feel of a warm, late afternoon autumn day. This is a powerful and useful image-enhancing tool.
The best use of Film Damage is when you have to mix real film footage with video that needs to match it in some way. I'm generally not a fan of adding damage because it can look artificial. However, the Continuum Film Damage effect has so many controls you can make the result almost imperceptible. To achieve a realistically subtle effect, I reduced the scratch width and the density of the other ingredients, such as dirt, hair and grain to a minimum. A nice feature of this plug-in is that it also includes saturation, contrast and brightness controls, so it is easy to enhance the image without having to use an additional plug-in. In a matter of minutes, I attained a very nice video image that had the subtle characteristics of film.
The Film Grain effect also contains extensive controls and goes beyond merely adding the illusion of grain. You have full control over grain size and color and you can make the grain monochromatic, or control grain in the colors of red, green, and blue. Unlike some grain effects, Continuum Film Look's grain randomly disperses the grain in each frame, just as occurs in real film. This makes the grain look very authentic and also helps it to blend more subtly into the image. I found that I could quickly achieve a very pleasing effect by adjusting the grain size and color in the three color bands. There is a blur control that helps to soften the effect. It offers several levels of Gaussian blur, but I found the "Pyramid smoother" setting to provide the smoothest level of blending. Finally, there is a tint control, which allows you to add a colored cast to the image. I'm not usually a fan of adding grain to video, but with the Boris effect I found that it actually added a pleasing texture to the image and made it feel less flat.
I found the Match Grain effect to yield similar results as the Film Grain. But Match Grain uses a sample from a film scan and presumably you can sample your own, although I did not have the means to do that. I achieved the best results using the monochrome setting and reducing the grain size while increasing the "filtering" setting. This minimizes the grain appearance and provided the best blending.
The Prism effect was a lot of fun to play with, but I'm not sure how I would use it. It creates a kind of three-color echo that can be like looking into a psychedelic tunnel. But it can also be minimized to create a subtle lens aberration effect. At the more subtle settings, the effect is a mild vignette blur with the center of the image most sharply in focus.
Of course, all of these effects can be used in any combination. I added Film Process to Film Grain and Film Damage to create a very convincing film-like image. If you are seeking a film look, I strongly recommend shooting at 24 frames per second, as that is a large factor in what makes film look different from video.
The Deinterlace plug-in creates a simulated 24-frame look, which will help if you have no alternative. I tried the Deinterlace effect in this package, but as with all deinterlacing methods, I was not able to achieve results that are as good as shooting progressive frames from the start. If you want to get the best results from the Continuum Film Look toolset, I suggest starting with 24p video. Rendering times on these effects are reasonable, about twice the time of the clip length. Rendering times increase significantly as you add multiple effects.
SUMMARY
Boris Continuum UpRez and Film Look are very effective tools for the editing arsenal. Continuum UpRez enables you to bring SD clips into an HD project and match the frame size while enhancing detail. Continuum Film Look is a comprehensive toolset that provides all of the tools you need to add most of the characteristics of film to a video image. They are powerful, versatile, easy to use and offered at a very good price.
Geoff Poister, Ph.D., is a member of the Film and Television faculty at Boston University and a regular contributor to TV Technology.
Get the TV Tech Newsletter
The professional video industry's #1 source for news, trends and product and tech information. Sign up below.
