Getting the Green Out: Red Giant’s Primatte Keyer 6
Red Giant’s Primatte Keyer 6 makes working with a green screen easy
It’s difficult to find a current film that doesn’t use some form of green or blue screen. Adobe Premiere has been doing a great job with Premiere CC’s Ultra Keyer and After Effect’s Keyframe 2.1, but Red Giant has released a new version of their Primatte Keyer (Version 6), which I will be reviewing.
I will only be reviewing how the software worked on one of my projects; if you need training (as I did), Red Giant has some fantastic tutorials for how to use Primatte Keyer on their website—www.redgiant.com.
I tested the Primatte Keyer while shooting a 10-minute comedy entitled “Prohibition Fellas,” which concerns two retiring bootleggers trying to make one last big score. Sitting in the cemetery in a vintage 1925 Henney Funeral Car, they must remove the booze filled coffin in the rear of the vehicle and exchange it with a similar coffin filled with money that has been placed in the cemetery.
FEATURES
Red Giant’s Primatte Keyer 6 is available as part of their RG VFX Suite and is a plugin for Adobe Premiere CC and After Effects. Once the software is downloaded, it is accessible through your Red Giant folder. Watching Red Giant’s Tutorials explains how easy the software is to use and how it functions.
As a brief aside, once I downloaded the software and applied the effect to my footage, a red “X” appeared as a watermark. I contacted Red Giant’s Tech Support and they were amazing. I was having some problems with my Mac’s Operating System and the version of Adode Premiere I was using. Not only did they solve my problem over the phone, but they asked for an error log from my computer (talking me through how to create it) in case the problem reoccurred. I also received periodic emails asking if I had experienced any other issues (I didn’t). Talk about a technical support system that works! The folks are incredible, friendly, they know their product and come to your aid immediately! Two thumbs up for Red Giant Support!
One of the reasons I initially chose Red Giant over the other green screen software programs was the almost idiot-proof method of operation. I do understand both Premiere and After Effect’s keyers and they function quite well, but Primatte Keyer is easier and, in my opinion, faster. I highly recommend viewing their “Getting Started with Primatte Keyer 6” available for download on Red Giant’s website. It spells everything out visually as well as aurally and talks you through some of the fine-tuning features.
I won’t go into detail on how to set up a green screen shot on your timeline, instead I’ll just explain the operation of Primatte Keyer itself. When you first open Primatte Keyer, drag the effect onto your video. Select “Auto Define Key” and immediately the “green” in your green screen is replaced with your background with almost no artifacts. You may also do this process “manually” in Primatte Keyer like you would in Premiere and After Effects by selecting the eye dropper and clicking on the green you want removed. But, at least in my case, Auto Define Key was faster. The “Clean Background” icon removes problems in your background, and “Clean Foreground” eliminates issues with your subject in front of the Green Screen. It’s really that simple. Of course, there are dozens of other small tweaking adjustments to make your Key perfect, but trial and error will get you the flawless Key.
IN USE
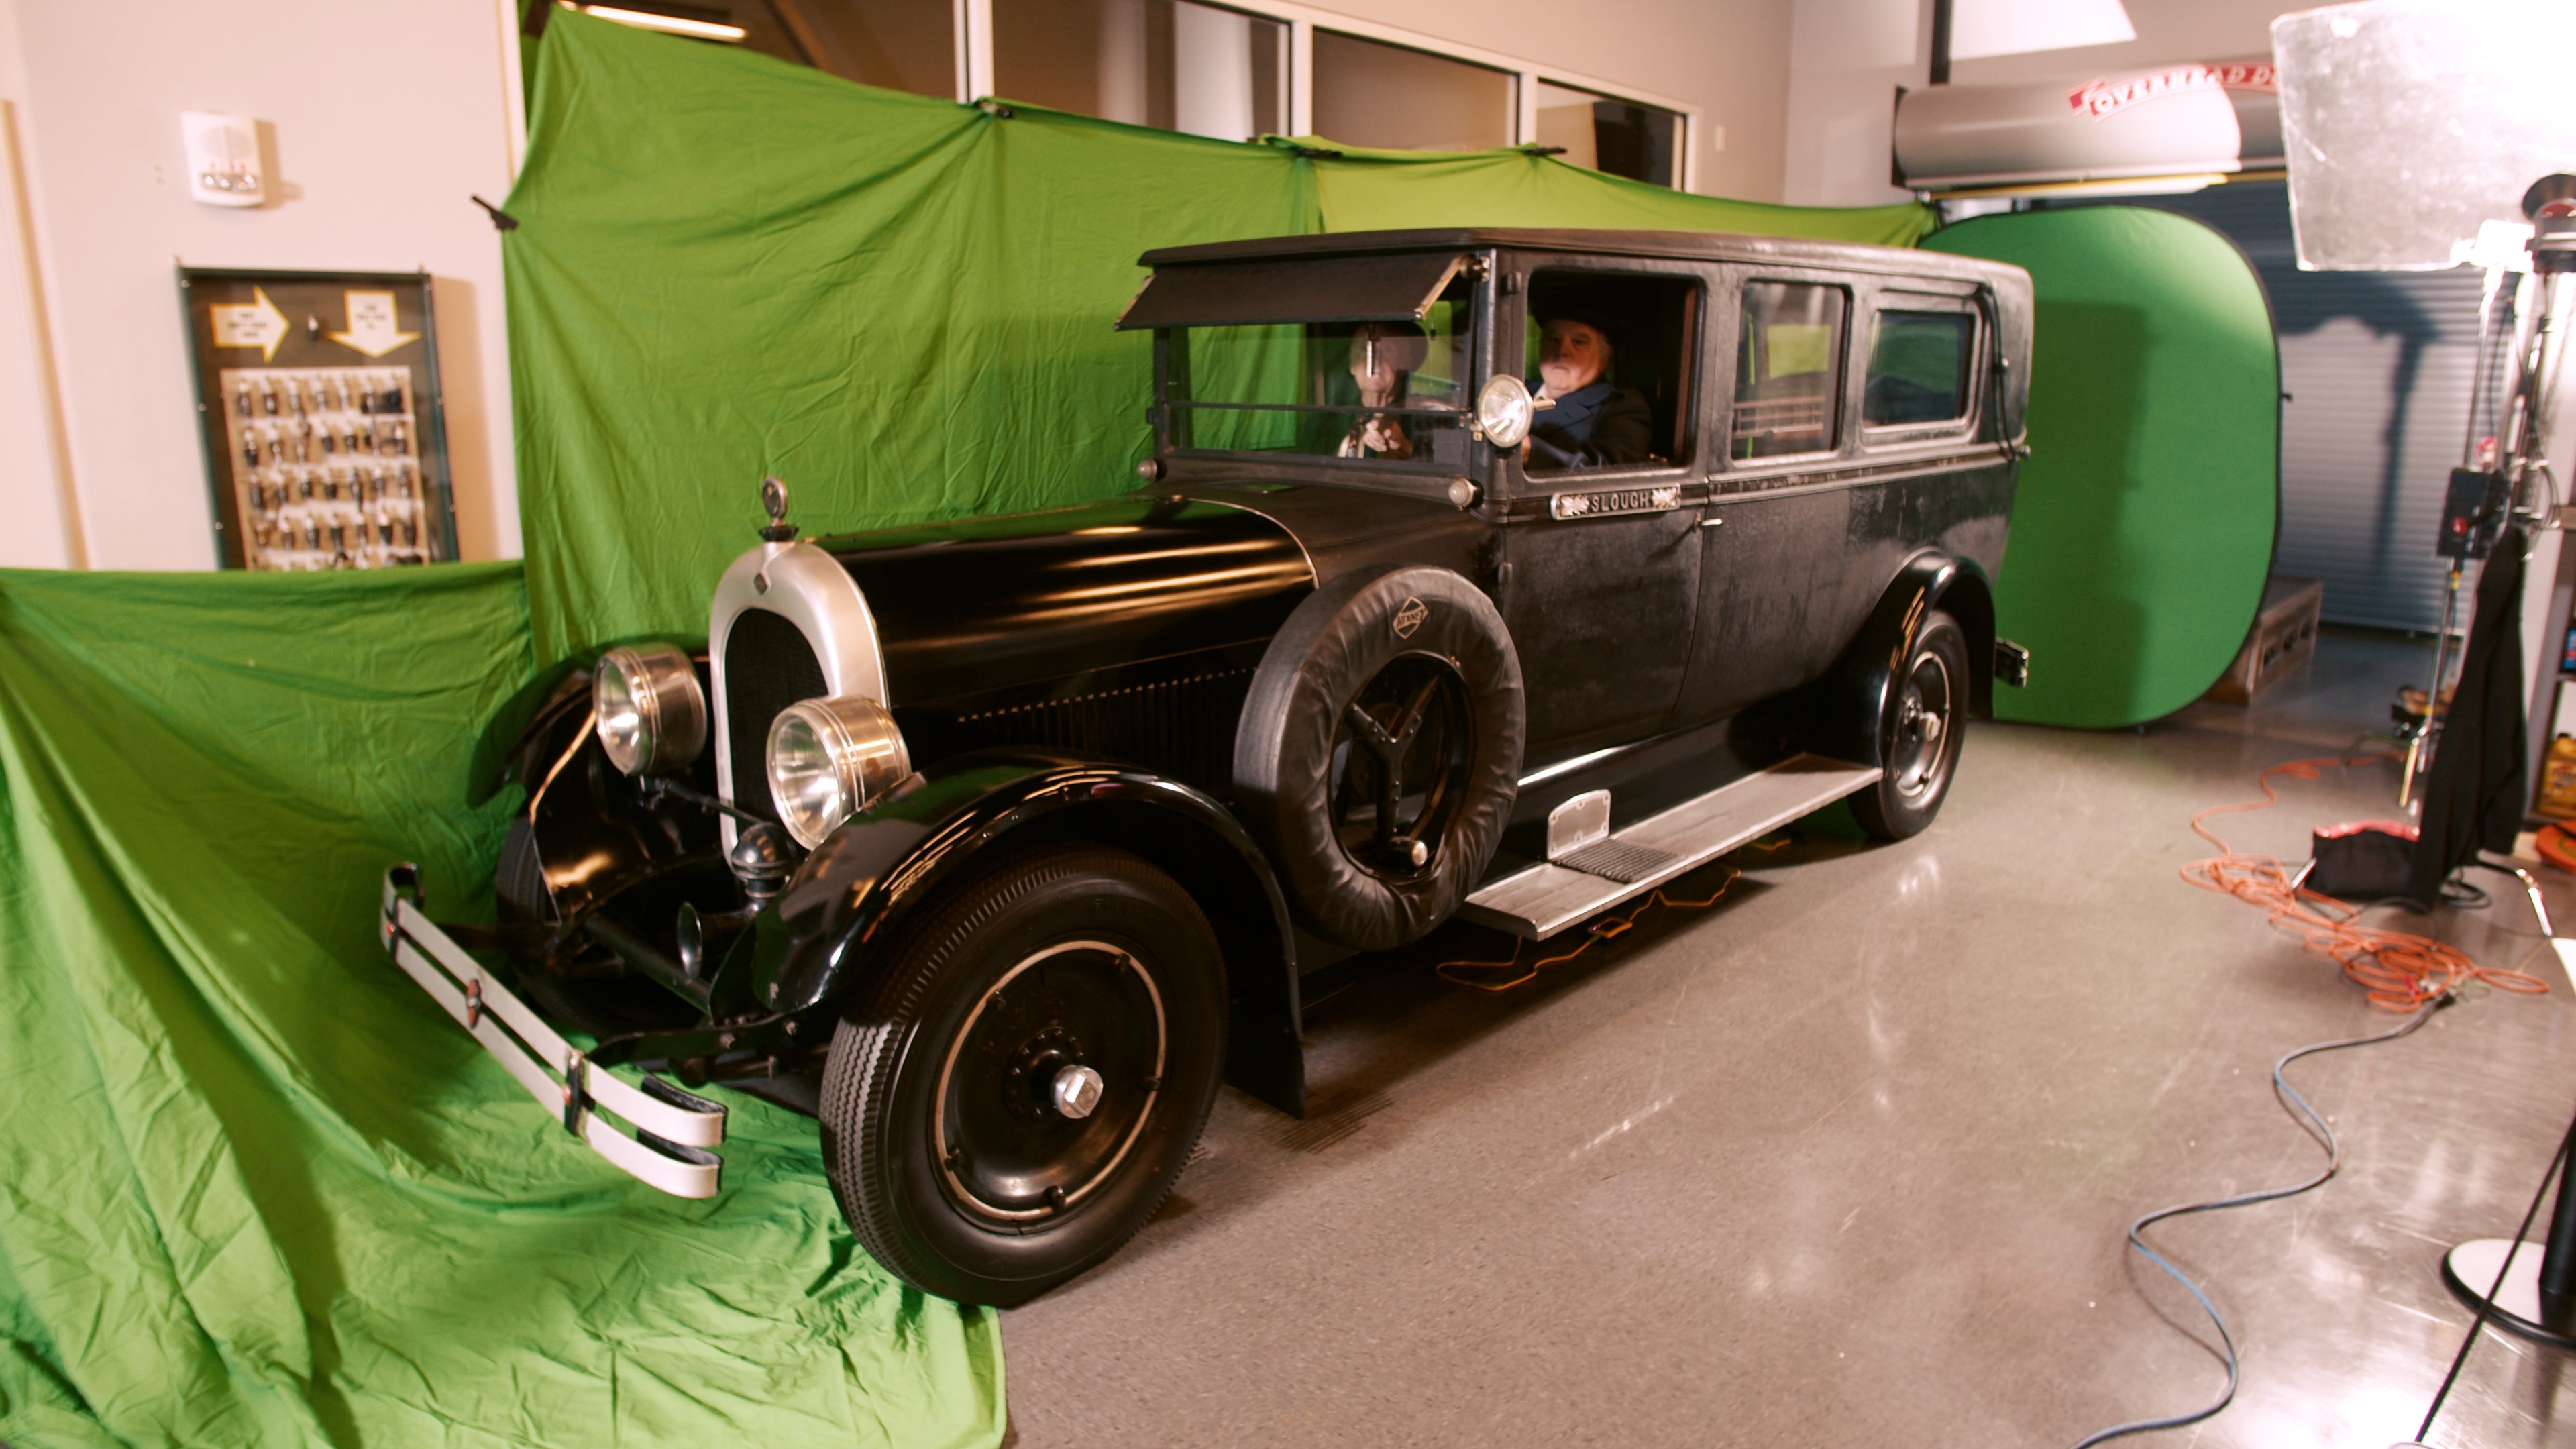
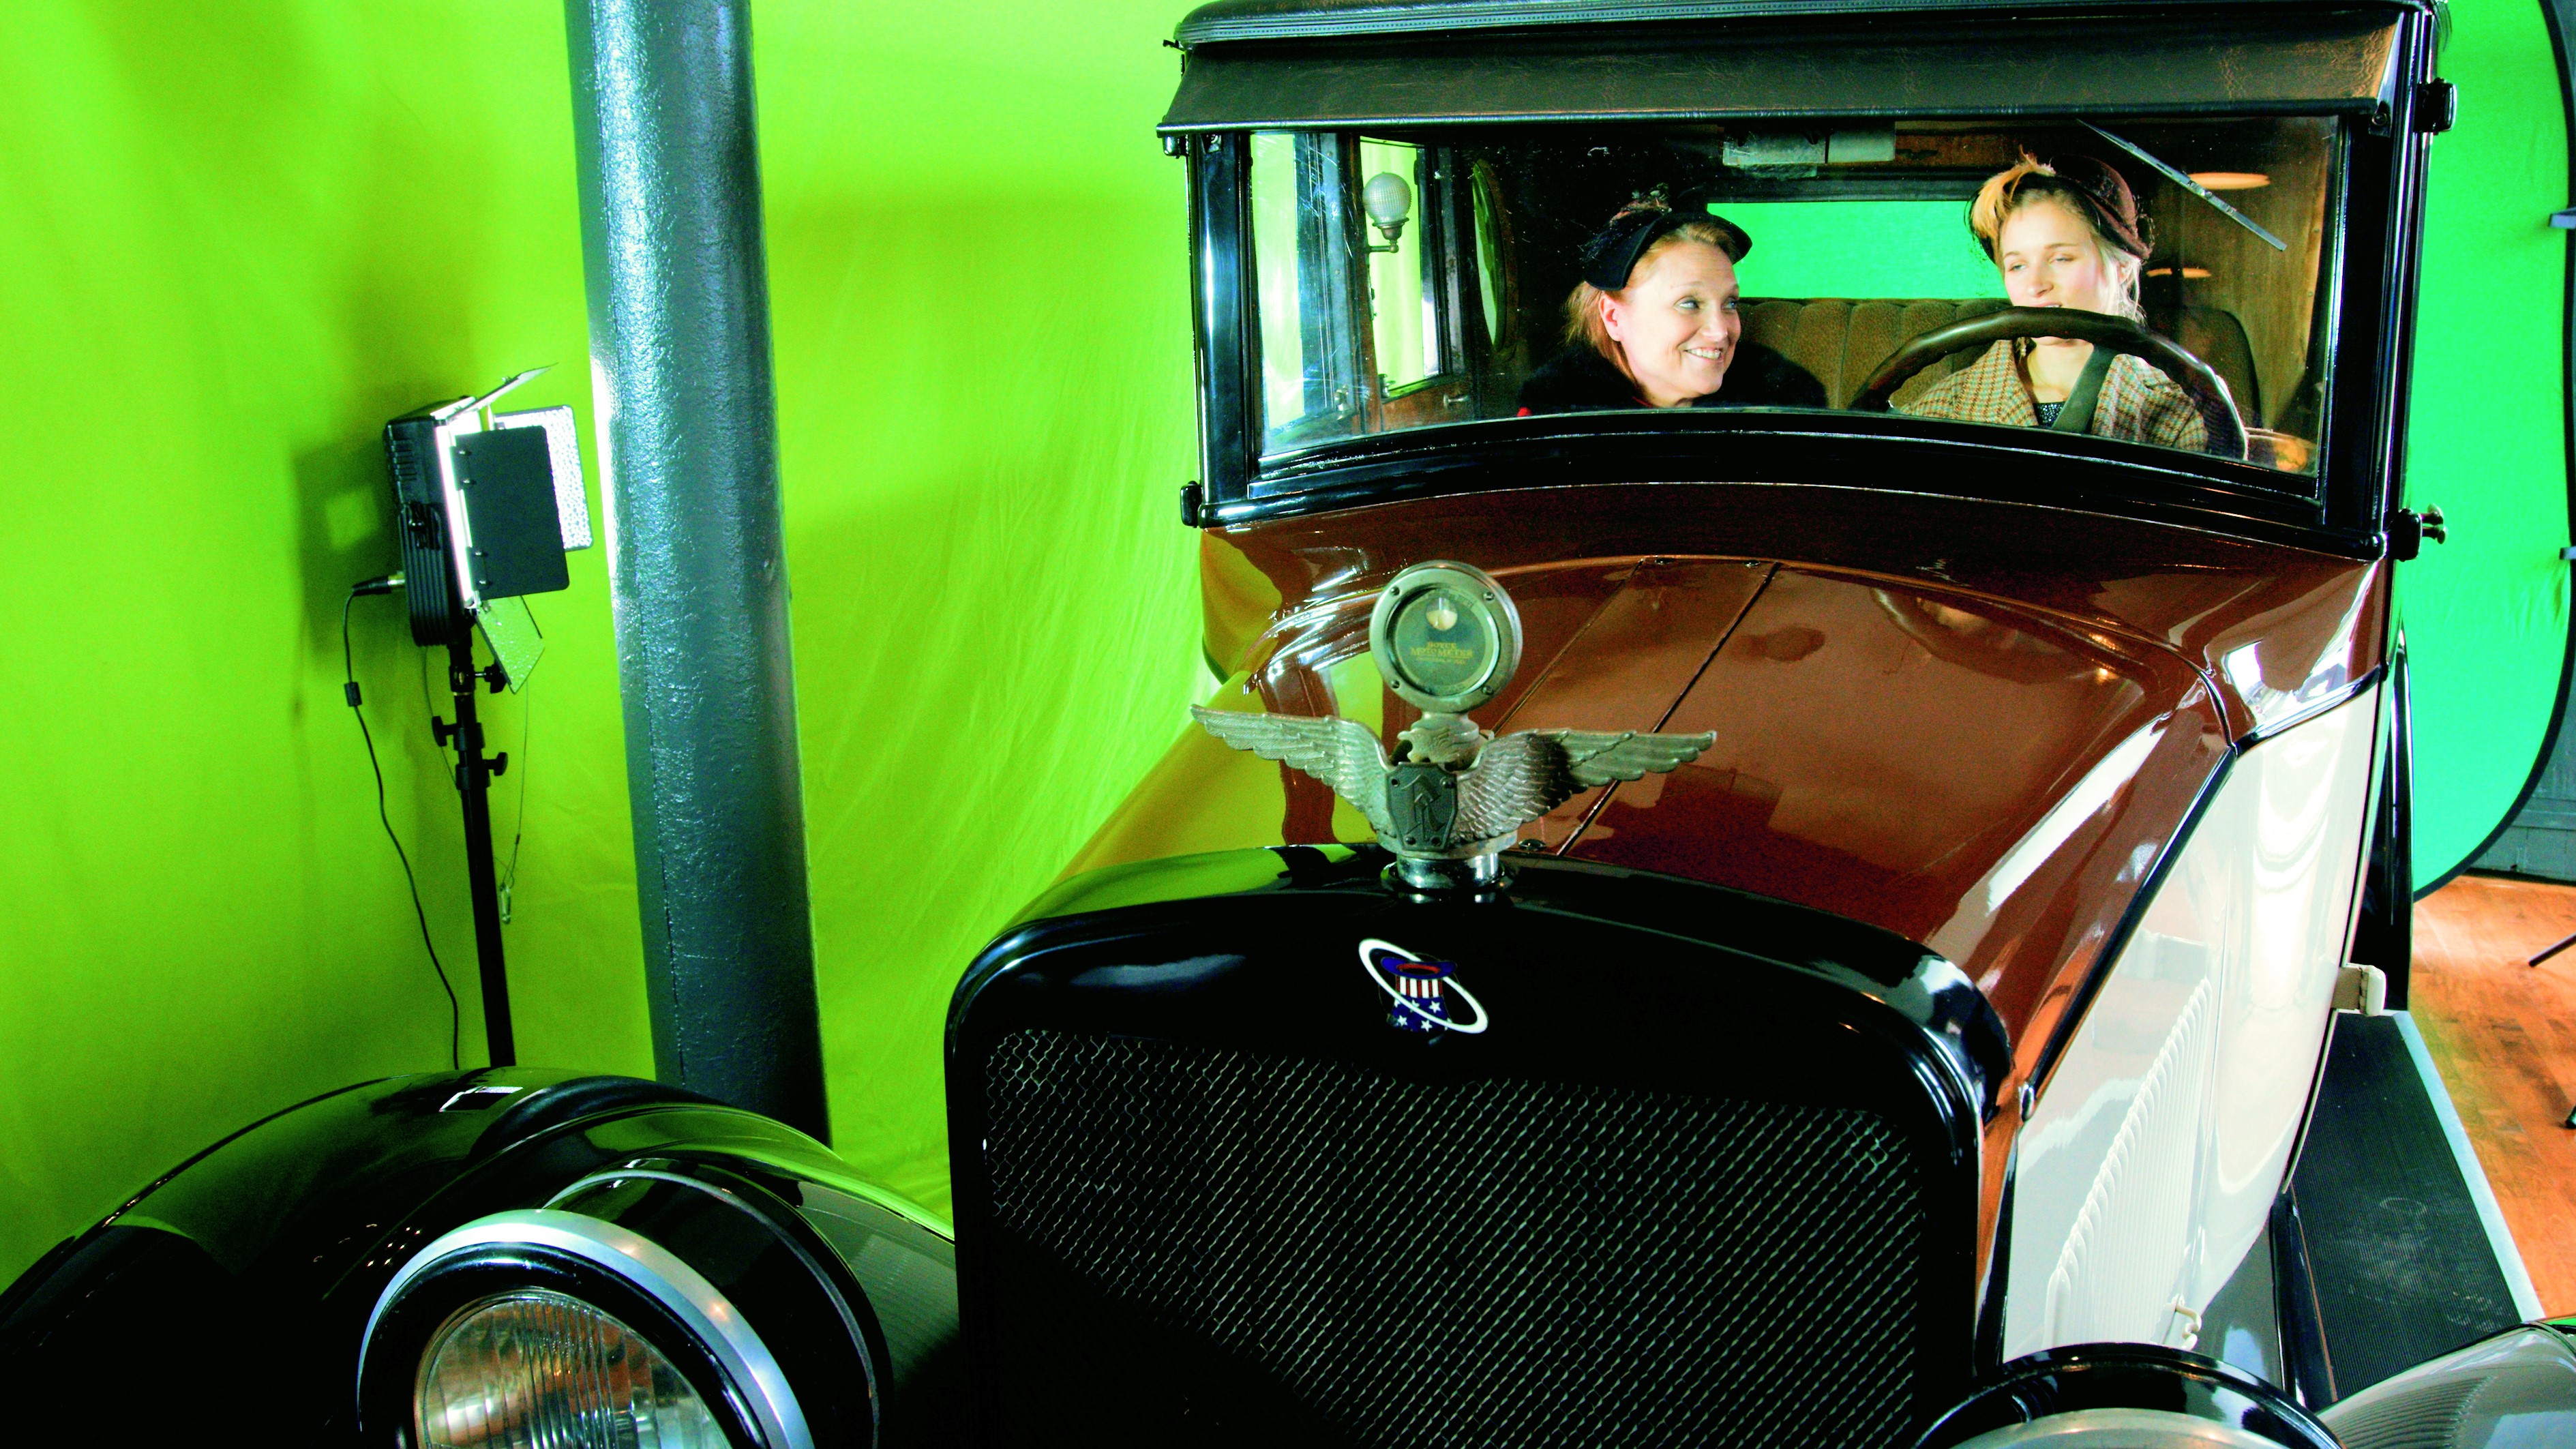
Because of the Henney’s rarity (this particular car is the only one known to still exist) and its location on the third floor of the America on Wheels Museum, we had to utilize green screen technology. The passenger side of the car was 11 inches from a glass wall and the driver’s side gave us free access to the vehicle. Once green screen fabric was hung around the vehicle, we were ready to shoot (see picture above).
As you can see in the image, green screen fabric was placed around the majority of the car. Sadly, not all of the green was the same color of green. We had a large area to cover with green and with the lack of a studio, this “mobile method” was the best we could do. The first step in After Effects or Premiere is to mask around the green screen so everything that isn’t green or “car” would disappear. I did that with the Masking Tool. Although the large wall fabric itself was the same color, shadows and wrinkles were more difficult to make disappear. I hoped this wasn’t an issue with Primatte Keyer—it wasn’t. If I did the keying (with Primatte Keyer) in Premiere or After Effects, I found no real difference. I am more familiar with Premiere’s software, so I chose that platform to do the majority of my editing and keying.
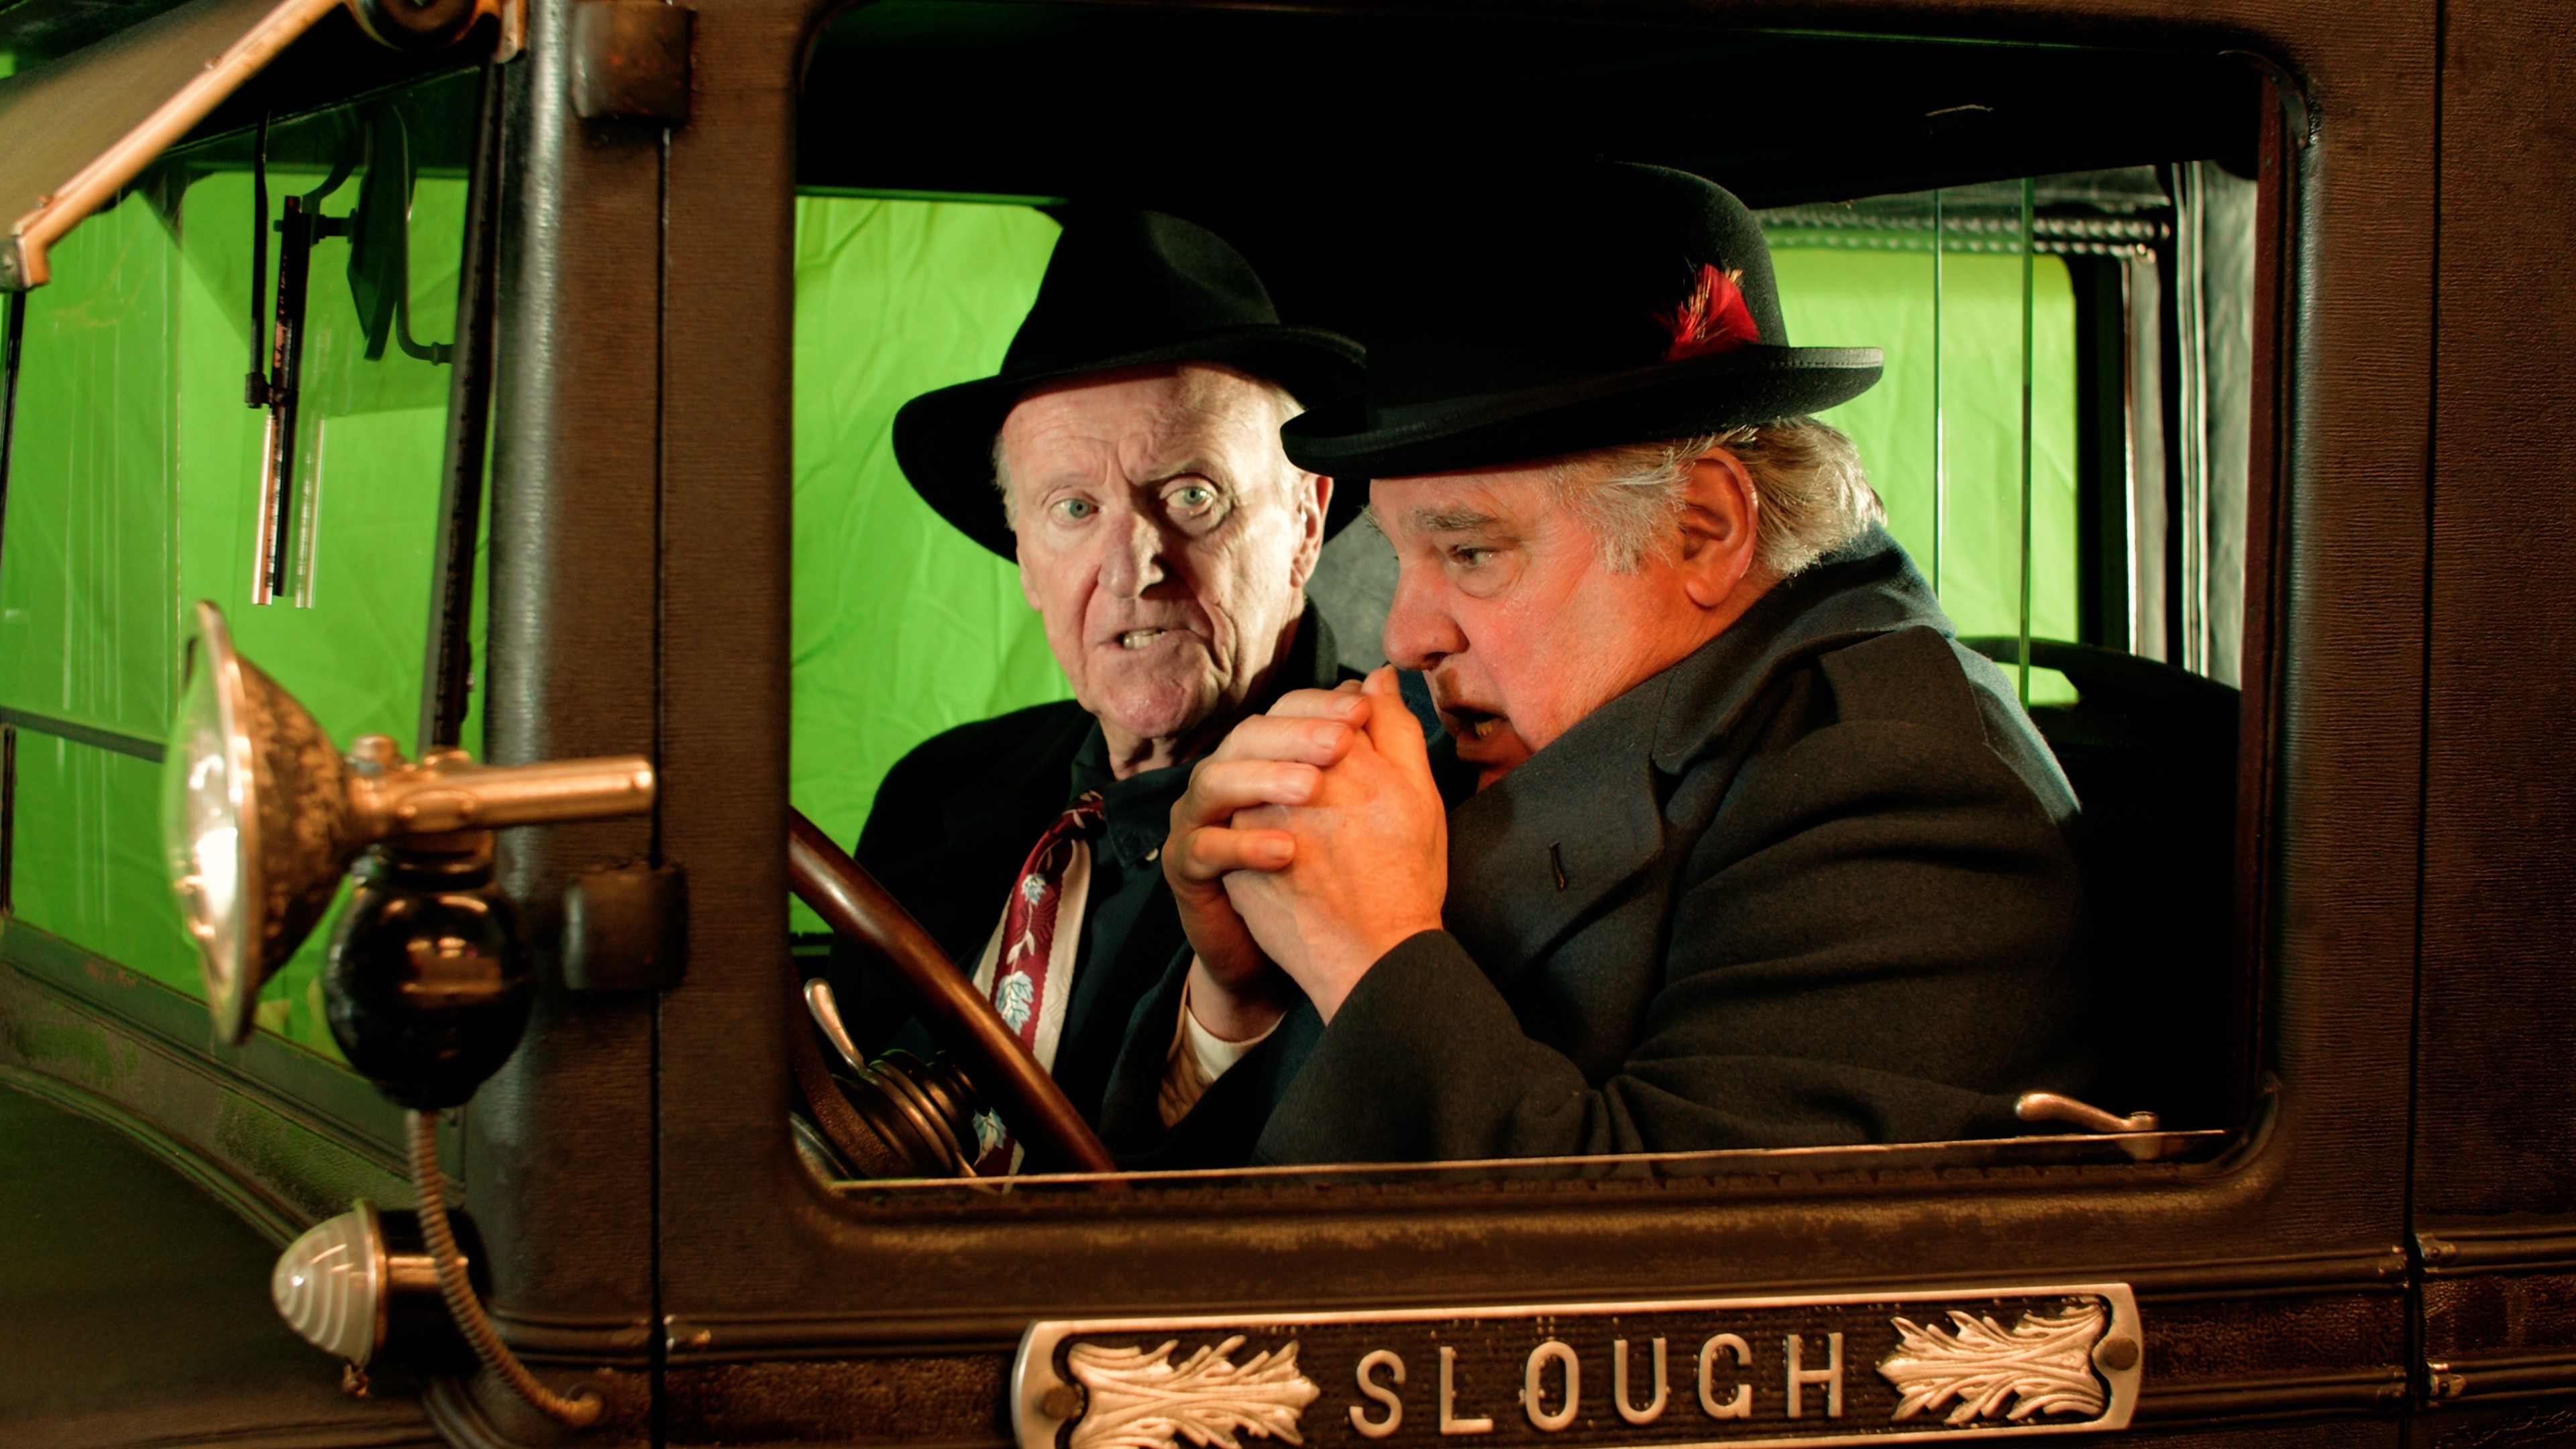
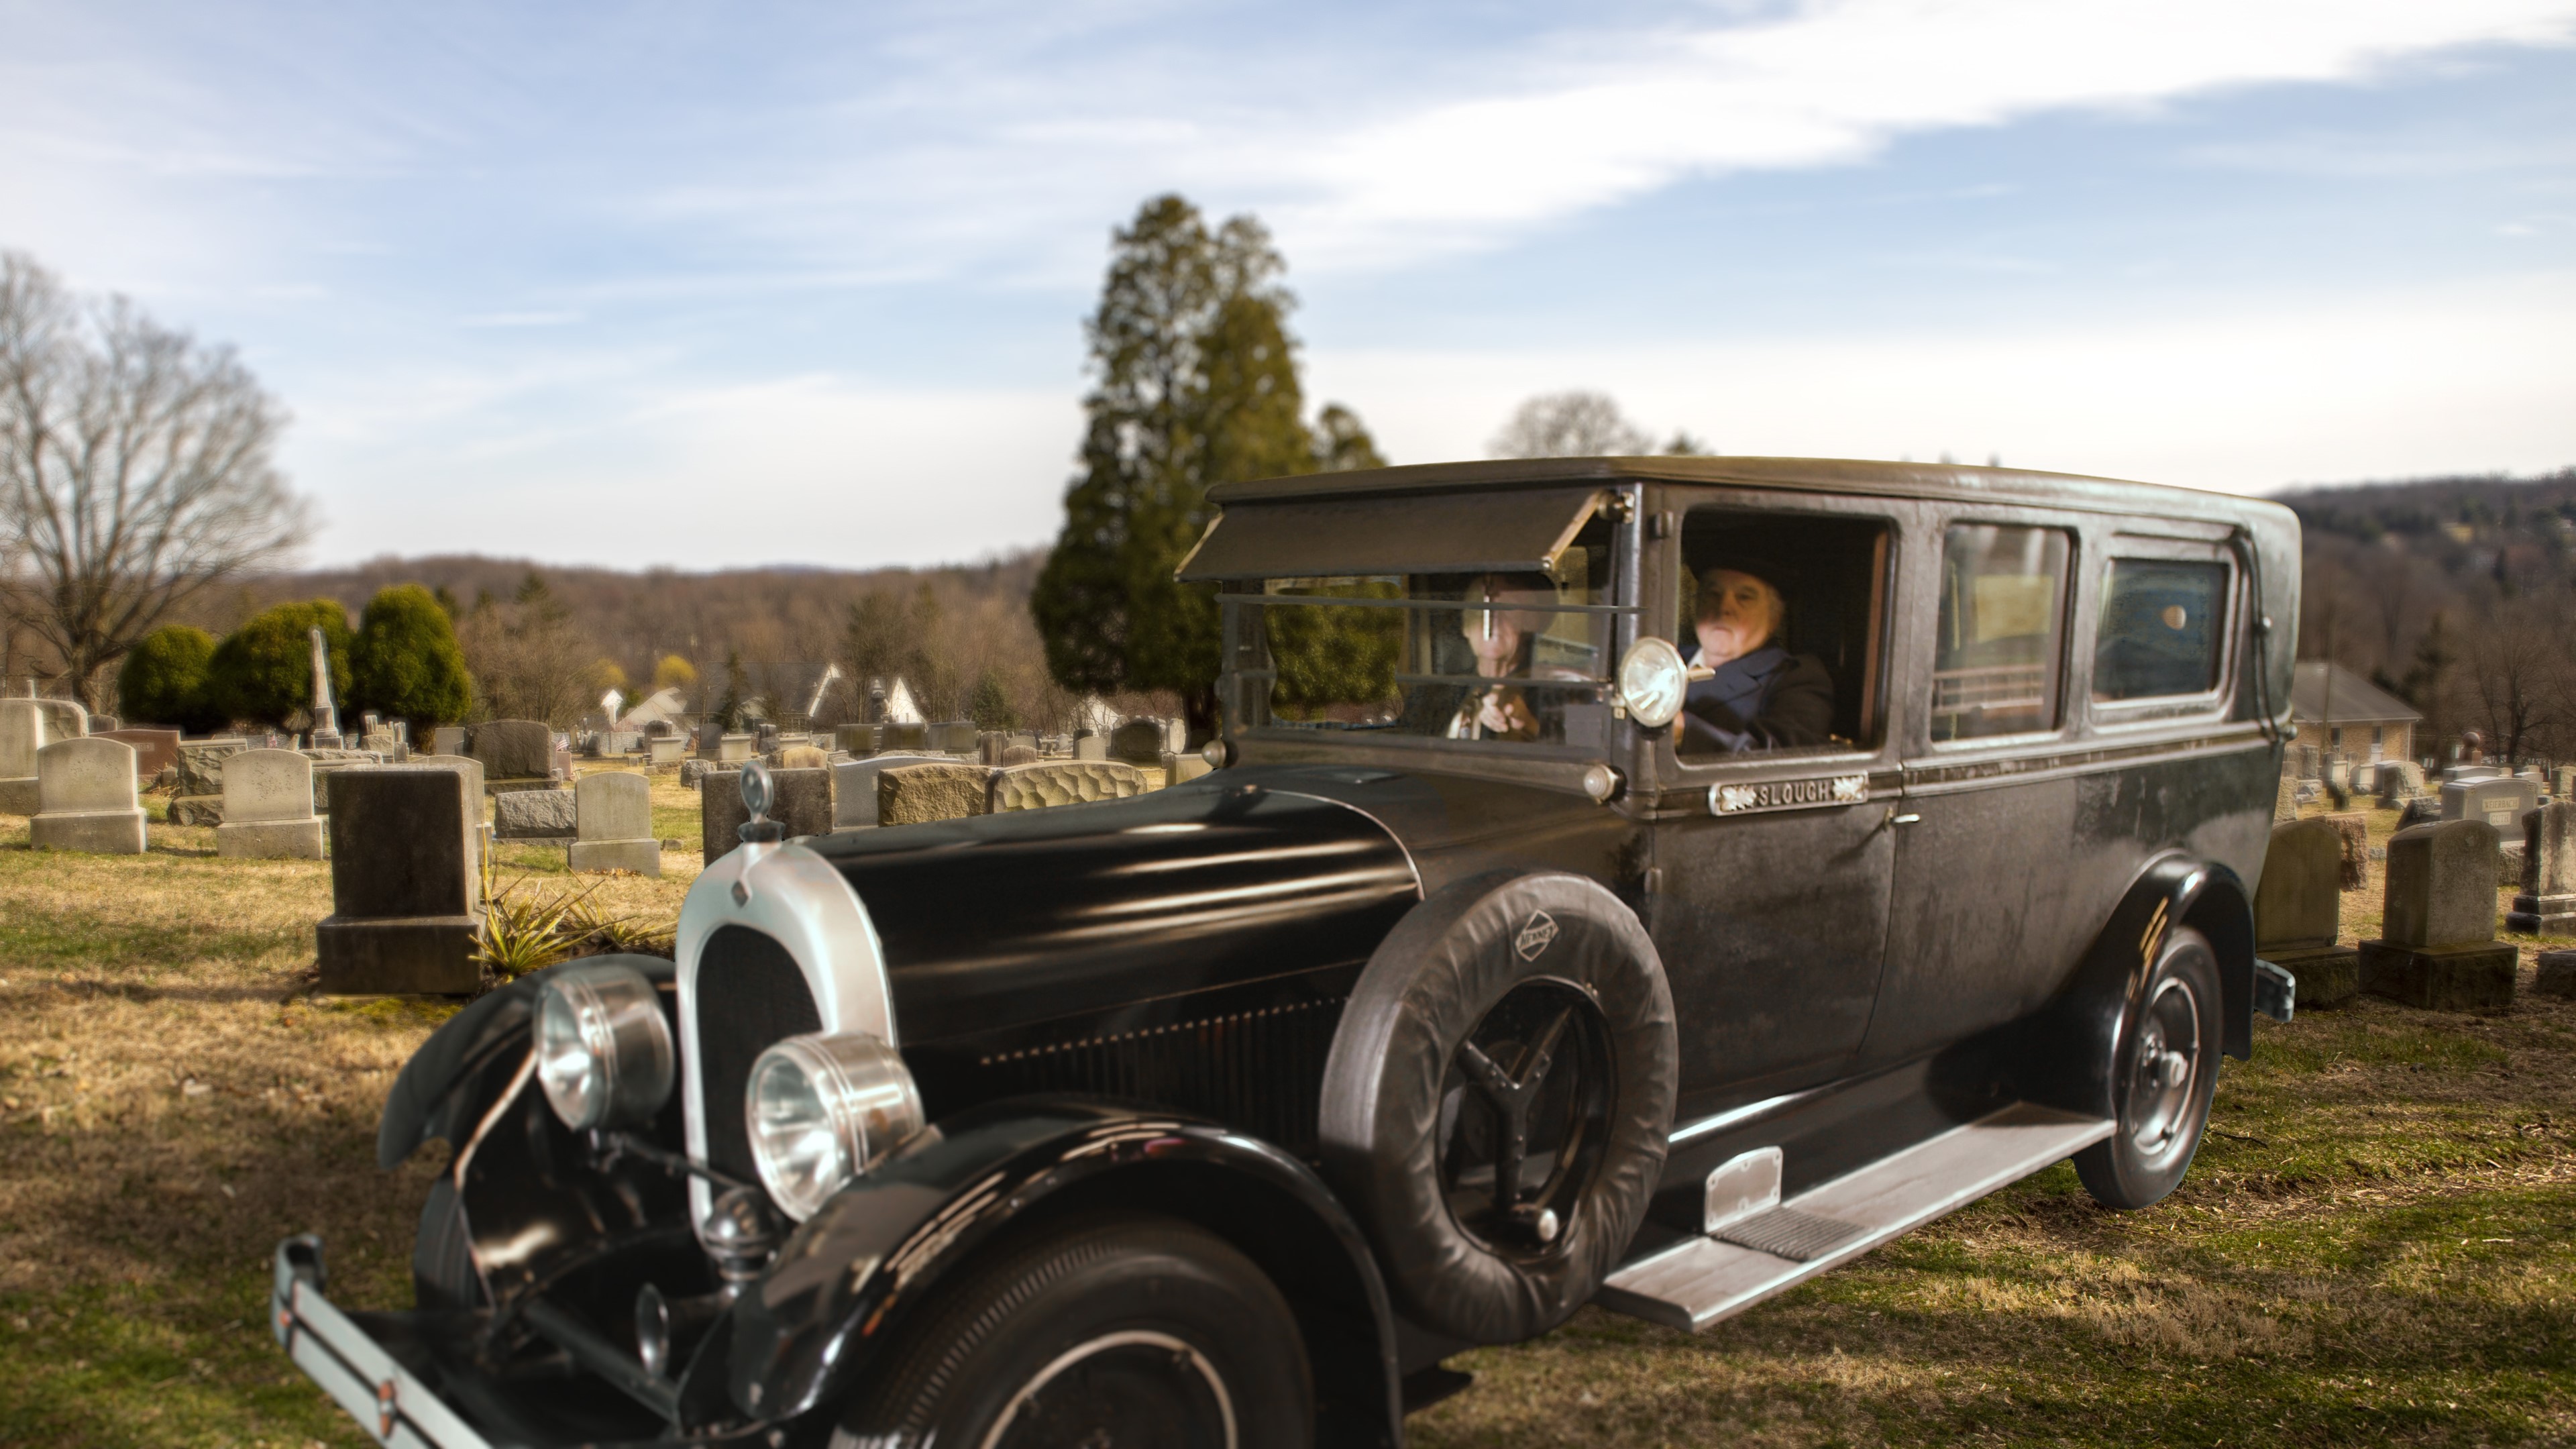
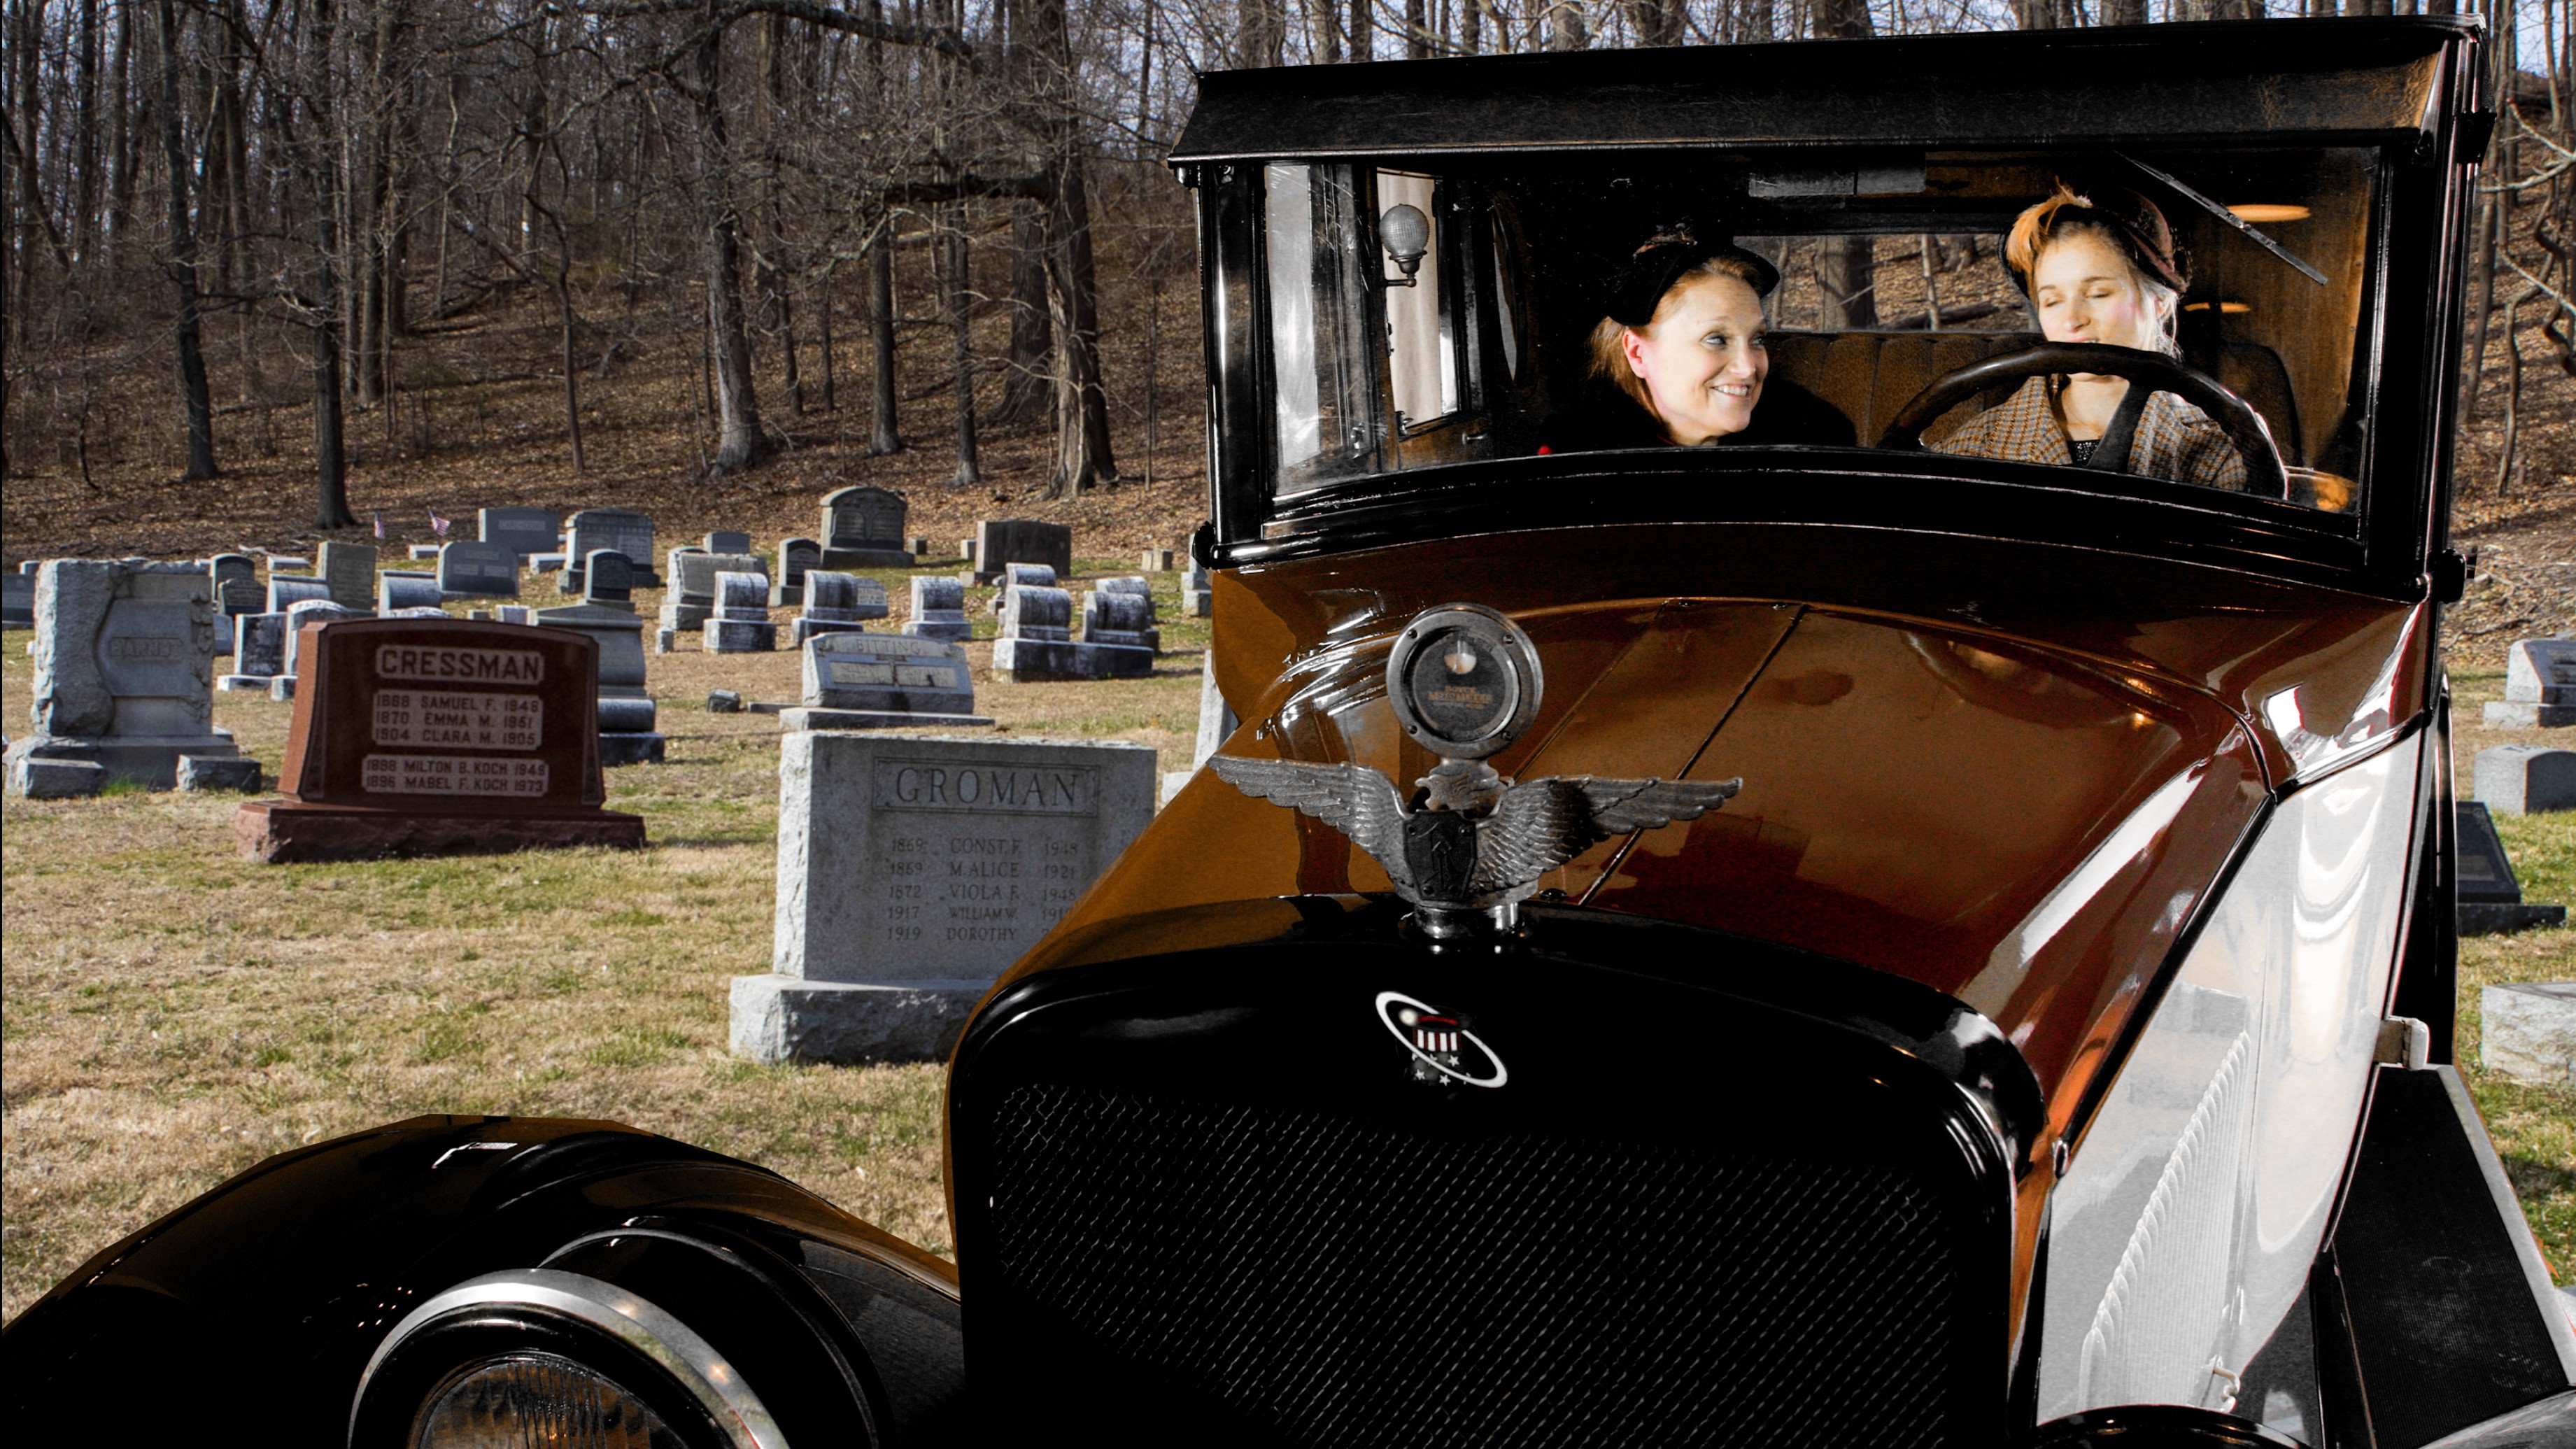
I selected “Auto Define Key” and 90% of the green was replaced with my background cemetery footage. As Red Giant’s Tutorial suggests, under “View Options,” select “Split Screen” and move the slider back and forth—the car and its occupants should be as white as possible with very little gray. Clicking and dragging across the actors faces allowed more of the grey to disappear and be replaced with white. The background footage (the green screen and masked areas) should be as black as you can make it. To make the car “whiter,” choose the “Clean Foreground” icon and drag it across the car to eliminate the gray. Then the “Clean Background” icon will have the same result on your black background. There was also a lot of green screen spill (green reflections) on the car because of its high gloss. These “green reflections” were removed with the “Spill Sponge,” which eliminated the green because these areas shouldn’t have the green disappear and the background showing through. There are other small adjustment tools I used to fine tune my image until it looked like the result in the photo below. Again, watching the Red Giant’s Tutorial really helped. Maybe it’s the child in me, but it still amazes me how when green screen disappears, almost anything can take its place—and it looks as real as if the car were actually in the cemetery!
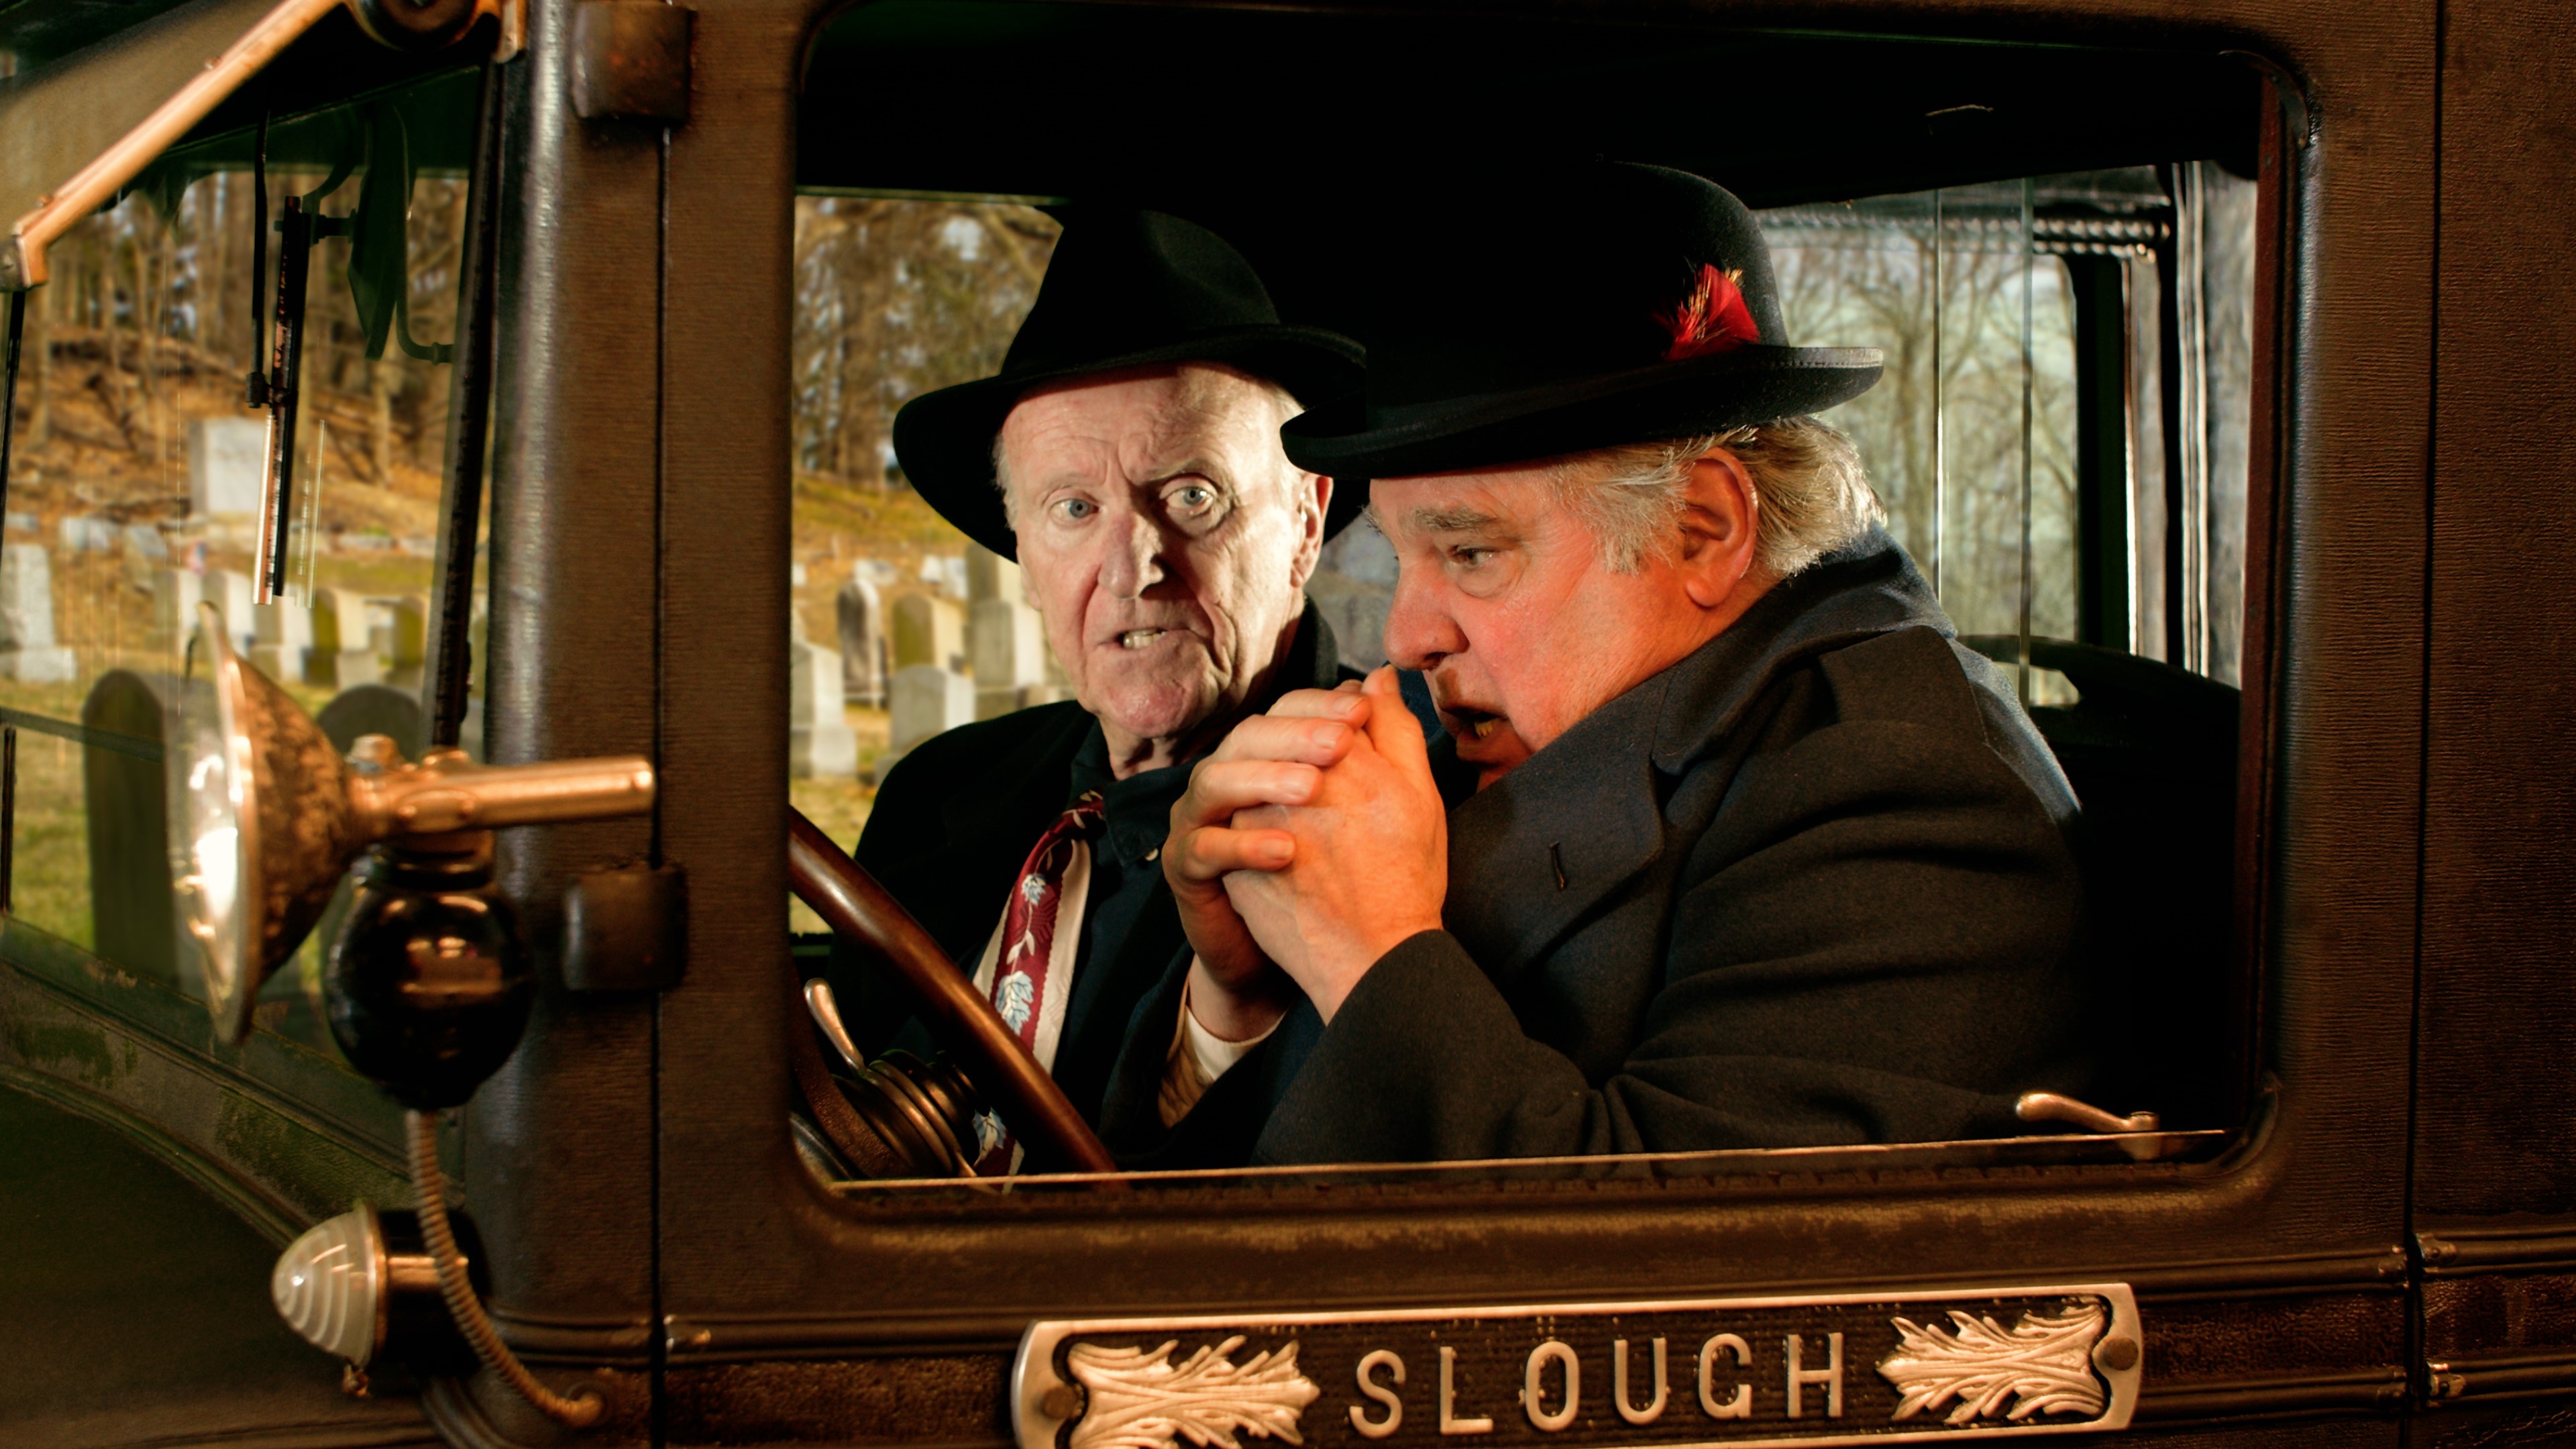
The medium shot of the actors within the car was much faster to key because the green screen was almost free of wrinkles and shadows. The Auto Define Key got it 98% right with one click—I couldn’t have done that with other keying software. Notice how clean the key was in the after shot as compared with the before shot. Not bad for less than 60 seconds of work. I owe it to my crew for stretching the green screen and lighting it so well.
In the last scene, scene six, the green screen removal on the 1925 Rickenbaker D6 Coach was more difficult. Utilizing another rare vehicle, the two women inside had to appear as if their vehicle were also parked outdoors in the cemetery—when they were in actuality parked in another indoor showroom.
Because the entire project was shot using Blackmagic’s Pocket Cinema Camera 6K, shooting in RAW, I had plenty of options in color grading, as well as manipulating the image (compressing or enlarging) without difficulty. The initial shot before masking can be seen here. Using the same masking tool in Premiere, I followed the contour of the vehicle and cut out as much of the background as possible. Not worrying about the daylight reflections from the first-floor showroom window, I felt there would be natural highlights bouncing off the high sheen of the paint.
Again, “Auto Define Key” removed the majority of the green with the “Spill Sponge” greatly needed for the spill on the fenders and hood. The “Clean Background” and “Clean Foreground” removed the green and allowed the background to show through. This time I only blurred the background about 4% with Gaussian Blur because the car was much closer to the camera. The end result is seen here.
The rest of the “green” throughout the production of “Prohibition Fellas” was easily removed with Red Giant’s Primatte Keyer. Still waiting for an outside running shot of the Henney, the picture will soon be in picture lock and the music scoring may begin. My thanks for RB Car Collections for access to both the Henney and Rickenbaker cars, and the America on Wheels museum for access the day before the pandemic began.
In my opinion, the easiest way to learn new software is watch the tutorial and apply it to your project. Red Giant has several other plug-ins that I’d like to utilize in my films. It still amazes me that we have “Hollywood-style” effects at our fingertips to make our humble productions look that much better.
Look to Red Giant for your next epic. You will be surprised how simple it is to have great results!
SUMMARY
Red Giant Primatte Keyer is an extremely easy to use plugin that removes green screen effortlessly. You will have cleaner keys with less time spent creating the final result.
APPLICATION
Housed in the RG VFX Folder in Adobe Premiere or After Effects, this plug-in is the only tool you’ll need to “get the green out.”
KEY FEATURES
Red Giant VFX Primatte Keyer is an extremely easy to use plugin keyer for Adobe After Effects and Premiere that quickly removes the green screen in moments. Other included tools allow keying and removal of spill are much more difficult and extremely time consuming, if not almost impossible to totally eliminate the green with artifacts. If you do a lot of green screen removal, there is no easier software out there. If I can learn it, anyone can!
PRICE
Red Giant VFX Primatte Keyer– List Price $199.00. 14 Day Trial – No Charge
CONTACT
Red Giant LLC
4230 SE King Road
Unit #345
Portland, OR 97222
Phone: 260.918.4505
www.redgiant.com
Chuck Gloman is an associate professor in the TV/Film Department at DeSales University. He may be reached chuck.gloman@desales.edu.
Get the TV Tech Newsletter
The professional video industry's #1 source for news, trends and product and tech information. Sign up below.
Chuck Gloman is Associate Professor with the TV/Film Department at DeSales University.

