DV 101: Easy HDSLR Post Workflow

VideoToolShed QtChange
ORLANDO, FLA.—The interest in shooting video with HD-capable DSLR still cameras shows no sign of abating. There's plenty of interest in recording all manner of productions with this nimble, cost-effective technology. Even high-end projects will routinely mix a Canon EOS 5D or 7D as a second camera alongside an ARRI Alexa or RED ONE.
Most modern NLE software makers are improving performance when using the native H.264 camera files, but I would argue that's not the best way to work. Although you can cut these files directly into an Adobe Premiere Pro, Avid Media Composer, Grass Valley EDIUS or Apple FCP X timeline, performance is still better with an optimized media format like Avid DNxHD or Apple ProRes. None of these native approaches properly addresses the lack of timecode, should you need to move the media files into another application via EDL or XML files.
Here are the steps I follow for a smooth postproduction workflow whenever HDSLR or GoPro media is part of the production.
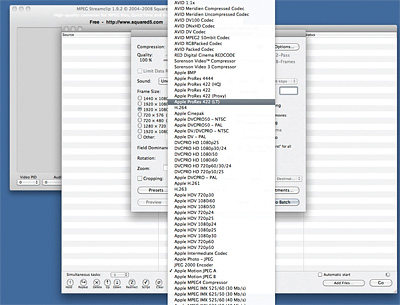
STEP 1: Transcode the files. There are several tools for this, including the Canon EOS Log and Transfer plug-in for Final Cut Pro 7, VideoToolShed's Offloader or Red Giant Software's Magic Bullet Grinder. My favorite is MPEG Streamclip from Squared 5. It's free and can write to any licensed QuickTime codec installed on your system. After you've copied the camera card's contents to a hard drive, open MPEG Streamclip's batch window and add the .MOV files from the copied media folder. Adjust your output settings and target destination. MPEG Streamclip is multi-processor-aware, so on a quad- or eight-core computer, crank the number of simultaneous processes up to the max of four. I like to create a new folder for each set of camera card files in order to correspond to the originals. If I'm cutting on Adobe Premiere Pro or Apple FCP 7 or FCP X, I'll transcode to ProRes 422 or ProRes LT. For Avid Media Composer projects, I convert to DNxHD (QuickTime).

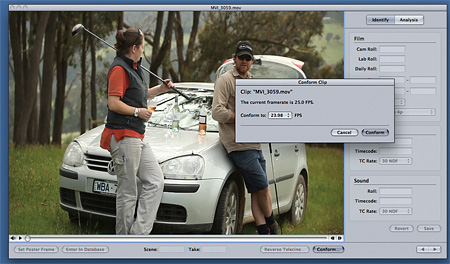
Red Giant Software Magic Bullet GrinderSTEP 2: Conform the speed. The Canon cameras all record in video-friendly rates of 23.98, 25 or 29.97, but some models also record at 60fps for in-camera slo-mo. If you intend to run the files at a slowed rate, then use Apple Cinema Tools to conform the speed to 23.98. This is a quick process in which Cinema Tools rewrites the file's metadata, telling any QuickTime-compliant application to play the file at the new rate. Cinema Tools can conform the rate on a single file or on all the files in a folder as a batch process.
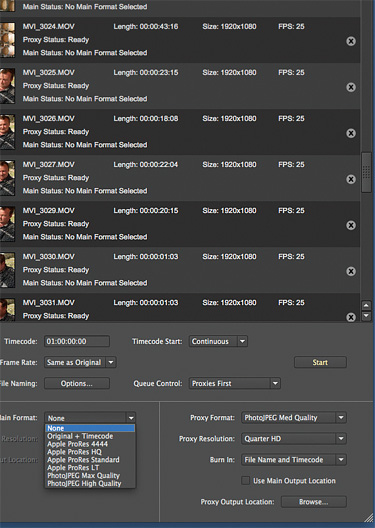
STEP 3: Add timecode. For the best interoperability between applications, camera files need properly embedded timecode and reel (source ID) information. You can add timecode during the conversion of the transcoded files if you use Grinder—or afterwards with VideoToolShed's QtChange. I prefer QtChange because it gives me the most control. If you have labeled the target folders containing the transcoded files with a name or mnemonic that serves as a valid reel number, then QtChange will embed this as a reel name into each file.
For example, I will use an eight-digit (or less) abbreviation that corresponds to the shoot date or location and card number. (Unfortunately, FCP X doesn't read embedded reel numbers within QuickTime files at this time.) Secondly, you can assign custom timecode start values. Typically I will start each set of files from a card with a new hour digit so that I have a series of files with ascending—never overlapping—timecodes. That's the same procedure a videographer commonly uses when recording to successive videotapes in the field.

Squared 5 MPEG StreamclipSTEP 4: Ingest. Next, import the files into your favorite NLE. In FCP 7, you can simply drag-and-drop the transcoded files into your project and start editing. If you are dabbling with Final Cut Pro X, you can use the recommended import procedure or simply move the files into the correct subfolder within the Final Cut Events folder on your hard drive and FCP X will recognize the newly added media.
I suggest that Media Composer editors import the old-fashioned way (not via AMA) if the files were transcoded to a DNxHD codec to ensure the video levels are properly maintained. Doing this (and sticking with Rec. 709 video levels) results in a "fast import." Media Composer is simply copying the files and rewrapping the audio/video media as MXF instead of QuickTime without any further conversion.
STEP 5: Sync sound. These cameras don't record the best quality audio, so most producers prefer to record double-system sound. A professional broadcast wave file recorder like one from Sound Devices is best, but if you are on a budget, the Zoom H4n is a popular choice. Plug in one or two external mics and record high-quality 48kHz tracks that will hold sync for the 12-minute recording capability of the cameras. Always record on-board camera audio, too, so you have a backup and a means to sync.
If you use Singular Software's PluralEyes or DualEyes, the wave file will be "auto-magically" lined up with camera clip's in-camera audio based on matching the two waveforms. FCP X uses a similar function.

Apple Cinema Tools If you prefer to match the sync manually to create merged clips, insist that the crew use proper slates and clapsticks. There's no excuse not to with the number of iPhone and iPad slate apps available. Aside from giving you visual scene/take info, it also provides for better sync. I've found that the internal camera audio
is about two frames out of sync with the image. Any software that aligns waveforms is doing so to something that's already slightly off. If you match to the clap in the picture instead, your sync will be dead-on.
Follow these simple steps and working with HDSLR projects won't be much different than other video productions. Your footage will be better organized and the media will be less taxing on your system.
Oliver Peters is an award-winning editor with expertise in commercials, corporate video, entertainment projects, television and feature films. He may be contacted at oliverpeters@oliverpeters.com.
Get the TV Tech Newsletter
The professional video industry's #1 source for news, trends and product and tech information. Sign up below.
