Keys to Key Light Placement
Making sure lighting and cameras stay in sync is vital to visual storytelling

If you’ve ever done single-camera production work, you already know how important lighting is. Taken together, lighting and camera skills comprise the foundation of visual storytelling. And, since you’re reading this column, you already know lighting is much more than just flooding an area with light.
While lighting someone for a one-camera shoot is relatively straightforward, the degree of complexity increases as more cameras and angles are added. As with juggling, the more balls you’ve got in the air, the trickier it gets. To help simplify the task, we’ll look at a method for dealing with this challenge that doesn’t sacrifice portrait-quality lighting.
To narrow the scope of this topic, we’re only concerned with multicamera television shows. Cinema and episodic television lighting is very different from what we generally do. For starters, cinematic production uses “motivated lighting” as warranted by the story.
As visually stunning as that can be, it’s something rarely used on a news or talk show. Instead, we more commonly work with something best described as “nonmotivated lighting.” Motivated light originates from “natural” or “practical” light sources consistent with the filmed scene, whereas nonmotivated light originates from anywhere that suits our needs.
Storytelling With Light
Our objective is to present on-camera talent in the best light possible, letting them, rather than the light, tell the story. The goal is to provide attractive lighting that supports a well-exposed camera image. When done right, people look good and the video engineer doesn’t have to chase the iris setting when the shot changes.
Lighting one person for a single camera angle isn’t complicated. The well-known “three-point lighting” method serves as a good starting point for attractive portrait lighting. This technique forms the fundamental building block for television lighting.
But the pillars of three-point lighting can get a little shaky when the number of cameras increases. An example of this would be adding a second angle to cover an anchor camera turn during a long read or an alternate shot with a graphic. The solution is not to just repeat the three-point pattern like a cookie cutter for each additional angle. This is where we need to adapt the fundamental building blocks of lighting to better suit our needs.
The professional video industry's #1 source for news, trends and product and tech information. Sign up below.
For any particular shot, there’s always a perfect key-light position. The problem arises when two camera angles on the same talent position must look equally good without further adjustment. Fortunately, there’s a way to accommodate this without sacrificing good lighting.
Before we discuss this approach, let’s cover some solutions that seem attractive, but don’t work as well.
It’s a fairly common practice to place the key light directly over the camera, so why not just add a second key over the second camera? That approach doesn’t work here, because both cameras would see the second key light. This would result in a confusion of shadows on the anchor’s face, rather than a single modeling shadow. So, “no” to a second key light.
For any particular shot, there’s always a perfect key light position. The problem arises when two camera angles on the same talent position must look equally good without further adjustment.”
Another possible solution is to flood the set with a mush of shadowless soft light. Although this “forgiving” approach would illuminate the subject for multiple camera angles, its very flatness makes everything look two-dimensional and, frankly, dull. So, another “no.”
Yet another possible approach involves using separate key lights that are alternately faded between as the anchor turns from one to the other camera. This is tricky and requires a lighting console operator working in perfect coordination with the camera shot change. This is notoriously difficult to pull off without detection and best avoided.
Split the Difference
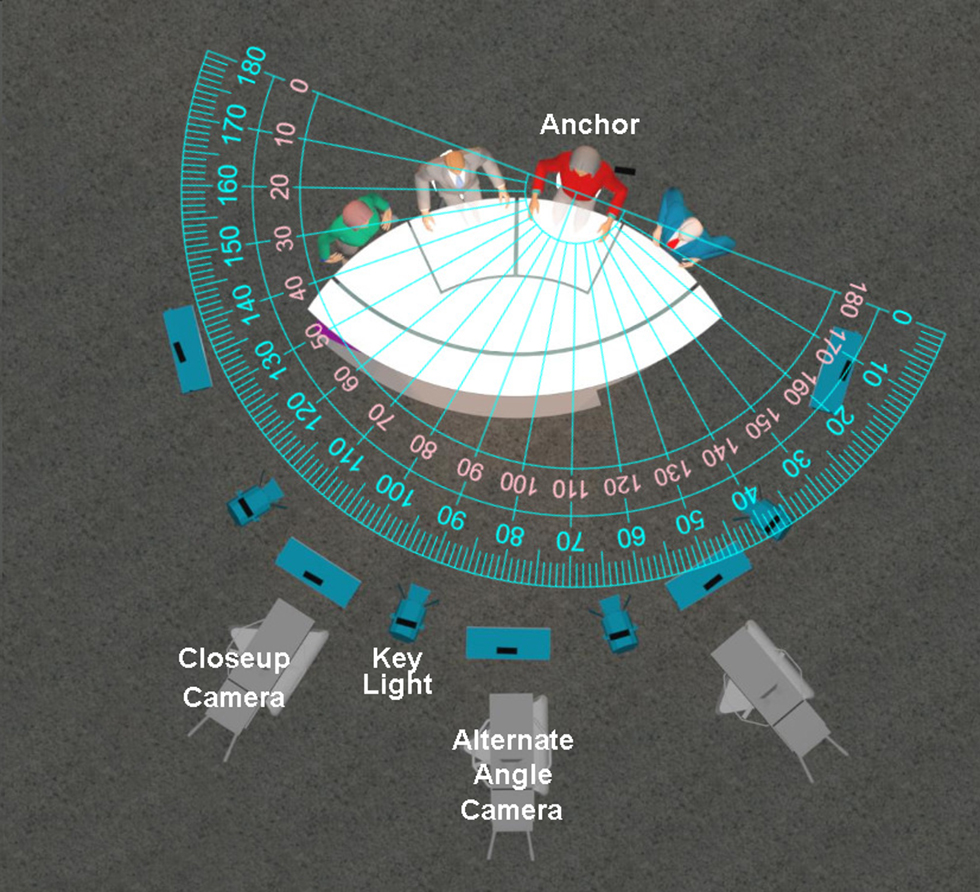
I suggest using the following simple solution to key-lighting an anchor with two cameras. Split the difference by placing a single key light between the two camera positions.
Normally, “split the difference” implies a compromise. In this case, it’s not. That slight offset of the key light helps provide beautiful modeling. Back when I was drafting lighting plots by hand, I would use a protractor to help guide light placement. As is the case here, challenging lighting problems often yield to simple geometry.
Although some TV lighting designers opt for putting their key lights right over the camera (which is a zero-degree offset), my preference is for a side/horizontal offset somewhere between 10 and 20 degrees.
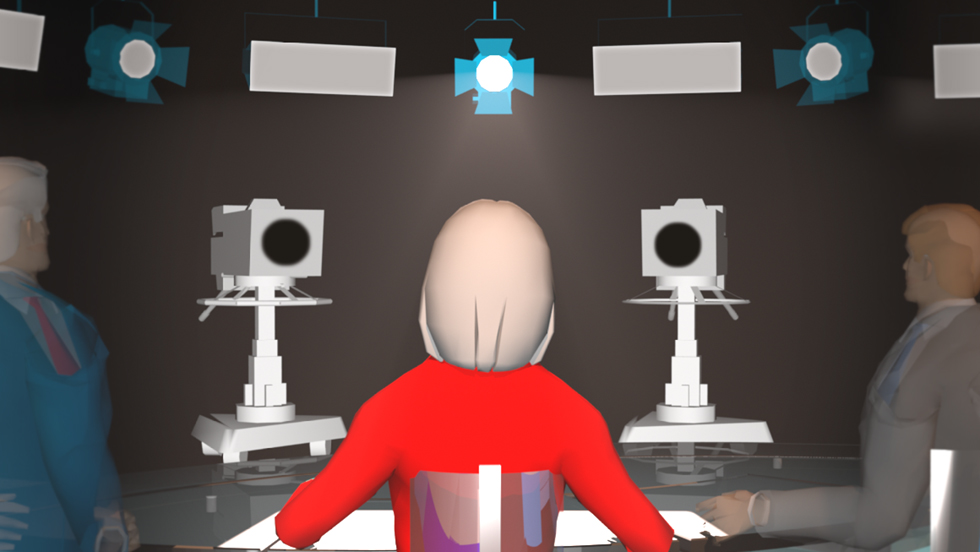
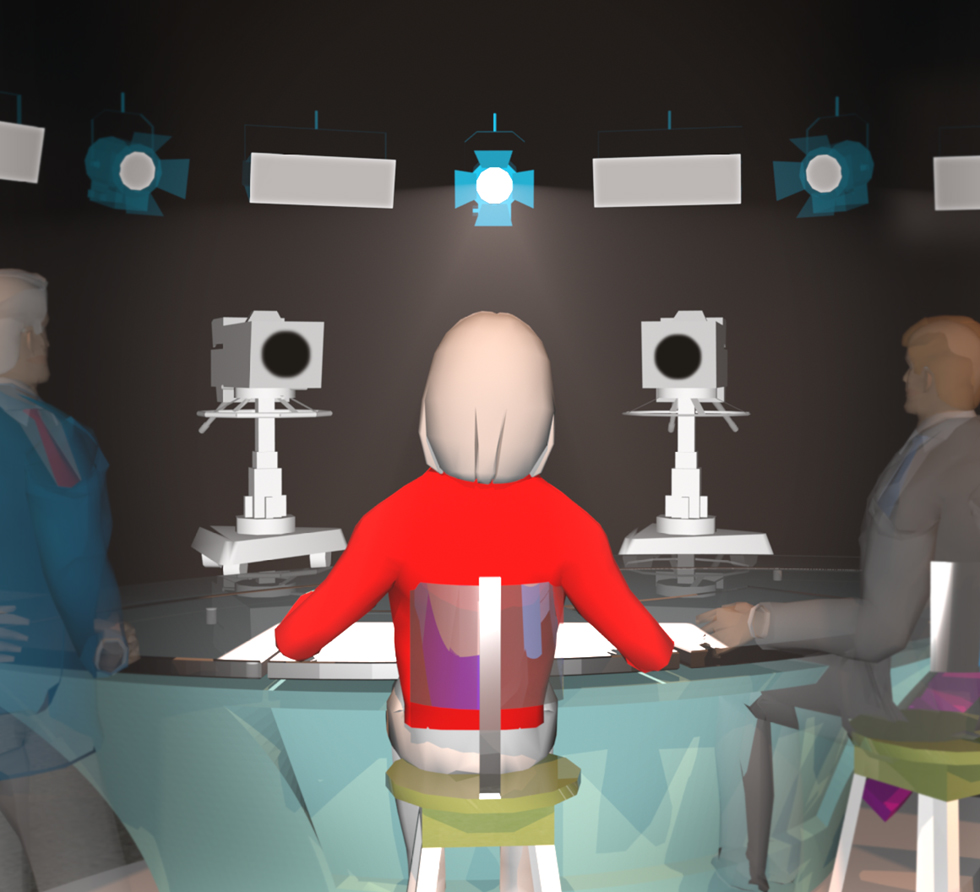
As you can see in Fig. 1, the two camera shots are relatively close to each other (roughly 28 degrees apart) with the key light placed precisely between the two cameras. That puts the key light at a 14 degree offset from both shot angles. This results in a good modeling shadow for both camera angles and makes visual sense on the shot change between them. And since only one key light is involved, as shown from behind the anchor in Fig. 2, the modeling remains consistent with no confusion of multiple shadows.
As for how steep the key light should be, there are multiple factors to take into account. Consider how the light angles will impact facial features (such as deep-set eyes), reflections of light fixtures in video displays and LED walls, or light washing out backlit scenic elements. These can sometimes present conflicting goals, influencing the lighting choices that must be made with every fixture placement decision.
According to one very successful master of network television event lighting, the ideal vertical angle is 22.5 degrees. That turns out to be exactly half of 45 degrees, which isn’t a coincidence.
There was a time when 45 degrees (both above and to the side of the subject) was considered the ideal lighting angle. But the industry and tastes have changed since Stanley McCandless first suggested his method of stage lighting. Contemporary tastes in this age of screens lean towards less acute light angles for their more forgiving impact on close-up shots. And in our corner of the visual arts, it’s important to keep the drama off of the faces.
A few techniques that inform lighting remain timeless today. We still use the Renaissance painters’ invention of “chiaroscuro” to create a sense of depth. Where they used paint, we use light, and those highlights and shadows are determined by where we place the key light.
Bruce Aleksander is a lighting designer accomplished in multi-camera Television Production with distinguished awards in Lighting Design and videography. Adept and well-organized to deliver a multi-disciplined approach, yielding creative solutions to difficult problems.


